How and Why to Read Tablature (TAB)
If you’re a guitarist, chances are you’ve come across tablature, or TAB, at some point in your learning journey. But do you really know how to read it properly and why it’s such an important tool for guitarists?
TAB is a notation system designed specifically for guitar that gives you an exact and simple way to read and play music. Unlike standard sheet music, which can be difficult to interpret for beginners, TAB provides a clear visual guide for which notes to play and where to find them on your fretboard.
In this guide, we’ll break down:
What tablature is and why it’s useful
How to read a TAB diagram correctly
Why TAB uses the same orientation as our chord diagrams
The role (or lack) of rhythm in TAB notation
How TAB compares to standard sheet music
By the end of this guide, you’ll be reading TAB like a pro and using it to learn songs faster and more accurately. Let’s dive in!
What Is Tablature (TAB) and Why Should You Use It?
TAB is a guitar-specific way of writing music that shows you exactly where to place your fingers on the fretboard. Think of guitar tab as a special map just for guitarists. Unlike standard music notation, which tells you which note to play, TAB tells you where to play the note on your guitar. TAB is very beginner friendly and a much quicker way to learn how to read written music when compared to standard musical notation.
Why Use TAB?
Beginner-friendly – No need to read standard sheet music!
Exact fret & string placement – Shows where notes are played on the neck.
Great for learning riffs, solos, and chords – Used across all genres of guitar music.
Widely used in online guitar communities – The easiest way to share music among guitarists.
Want to learn faster? Check out Noisy Clan’s Chord Cheat Sheets to visualize chords and scales effortlessly!
How to Read Guitar TAB: The Basics
TAB is read from left to right, just like standard notation. But instead of using traditional musical notes, it represents the guitar’s strings with horizontal lines and the fret numbers with numbers placed directly on them.
Diagram Orientation: Understanding the Six Lines
TAB uses six horizontal lines, which represent the six strings of the guitar:
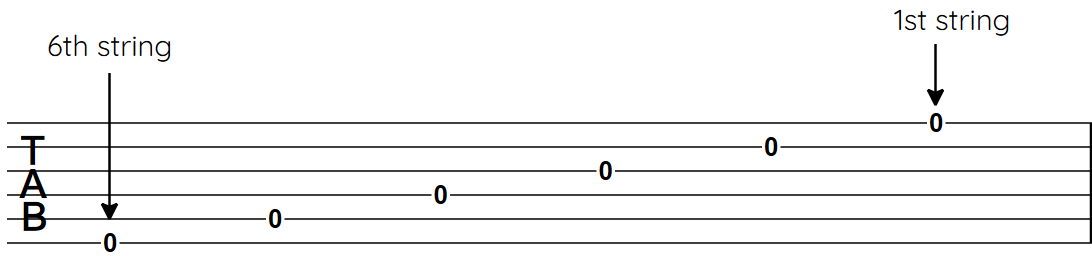
Tab became popular due to its simplicity and directness in showing which frets to press on each string to play a note. This makes it easier for beginners and other musicians to learn guitar music without needing to learn traditional music theory. Anyone can create and share tabs simply using a pen and paper, text editor or free online programme. Below is another tab example.
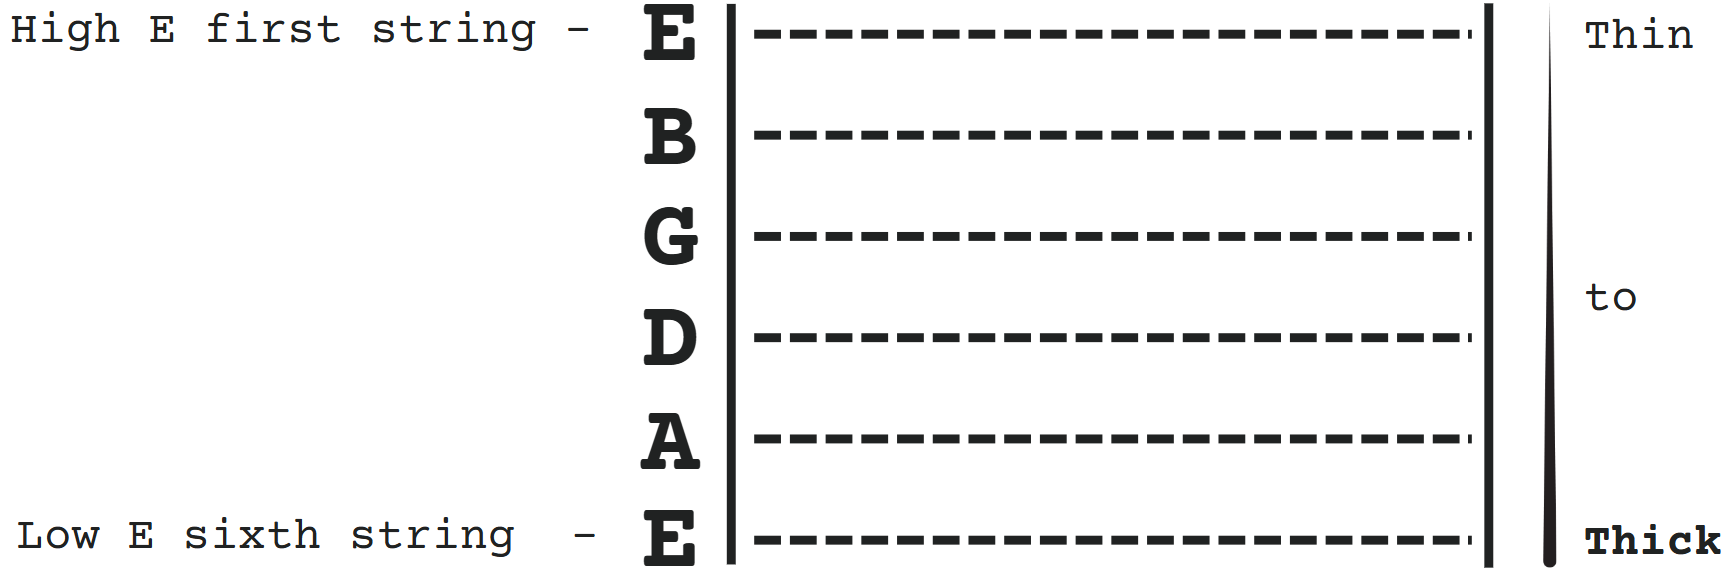
The bottom line represents the low E string (thickest string). Moving upwards, the lines represent the other strings in standard tuning in order: A, D, G, B, and finally the top line always represents the high E string (thinnest string). This mimics standard sheet music, Low notes on the bottom and higher notes appear higher on the page. Hold your guitar and look down at the fretboard—the strings match the layout of the TAB exactly. (This is also how Noisy Clan represents any of our fretboard diagrams.)
Looking for a smarter way to navigate chords and scales? Explore the Noisy Clan Guitar Chord Compass and unlock the entire fretboard at your fingertips!
Fret Numbers: Where to Place Your Fingers
The next step is the numbers that will be written on the lines. Each number on the lines represents which fret to press down on that string. The numbers do NOT represent which finger to use. This is very important and confusing for many.
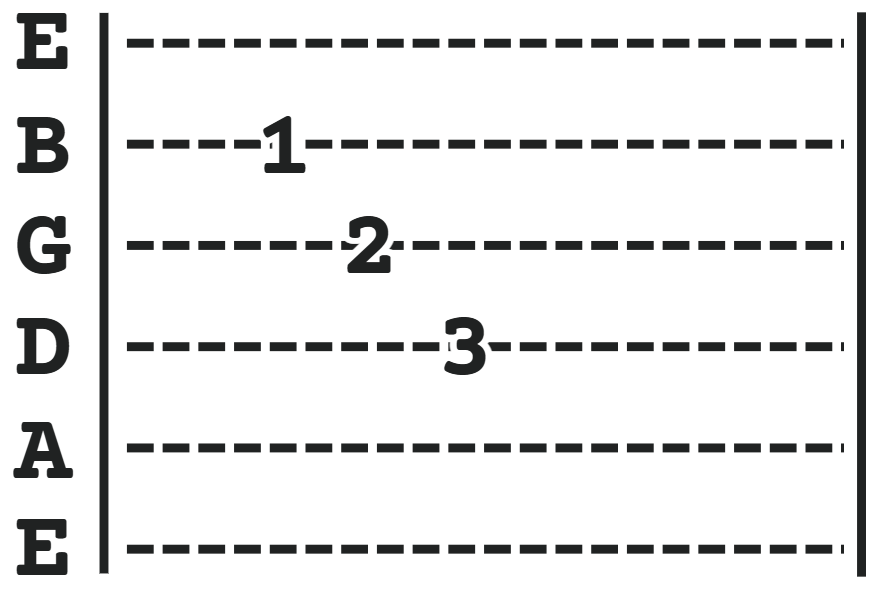
From the diagram above:
Press behind the 1st fret on the B string
Press behind the 2nd fret on the G string
Press behind the 3rd fret on the D string
An ‘0’ on any line means you play that string open, meaning that you pluck or play the string without pressing down on any frets.
Read from Left to Right
Read guitar tab from left to right, just like reading a sentence in a book. This shows you the sequence of notes you need to play. Notes that appear horizontally next to each other are played one after the other. Think of tab as a timeline. As you move from left to right, you play the notes in that order. A common mistake is not realising the left-to-right progression indicates the order of playing.
Stacked Numbers
Sometimes, you'll see numbers stacked on top of each other on different lines. This means you need to play all those notes simultaneously, forming a chord.
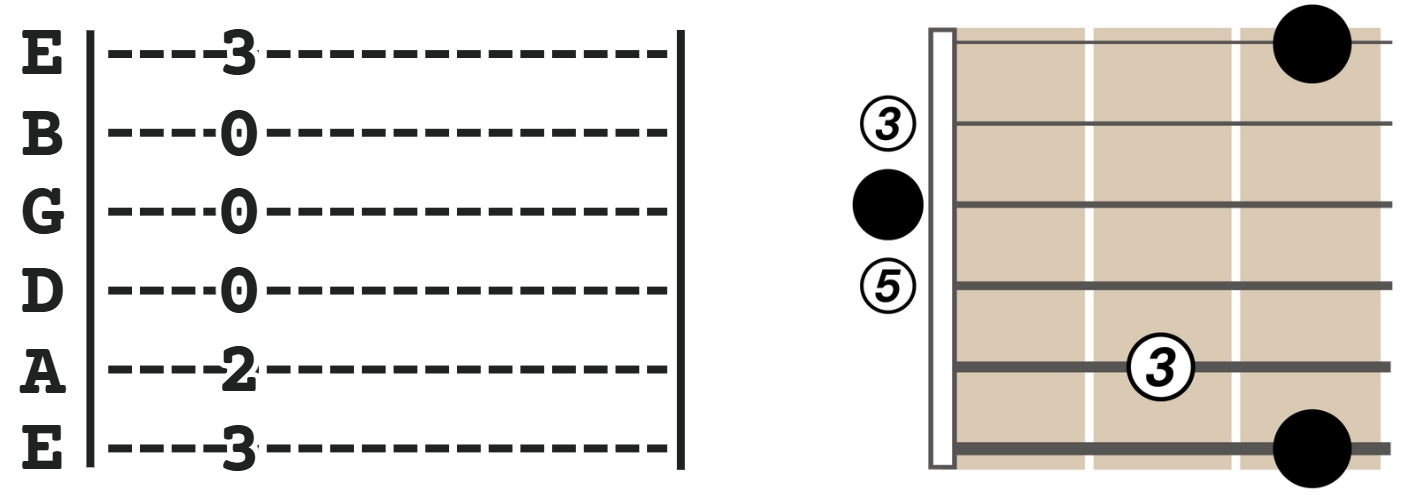
While TAB is a helpful reference to quickly learn to play a specific song or riff, it doesn't offer much in terms of reusable learning. TAB shows you exactly where to fret the notes, but it doesn't tell you which note is being played, or which note in the chord is the root, etc. Our diagrams fill in those gaps which allow you to re-use the same structures and patterns, learning more chords and scales much faster.
The tab diagram above shows a G chord that would be strummed with all the notes played simultaneously. The diagram below shows the notes from a G chord but they are NOT being played simultaneously. Here they are being played first with a simultaneous pluck of the G notes on the low and high E strings, followed by an alternating pick of the D and low G.
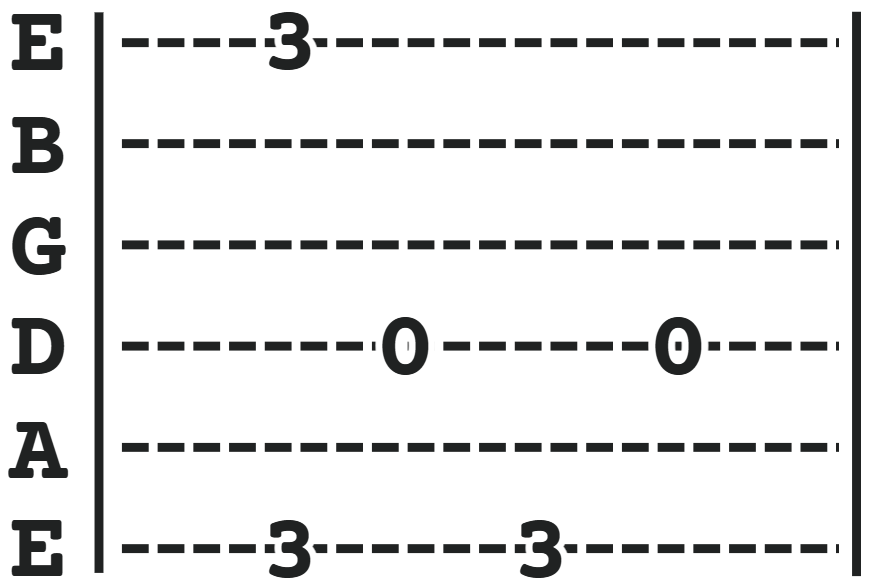
Similar notes but played differently. The spacing on the lines is important. Wherever you see numbers directly above each other that lets you know those notes are all to be played simultaneously.
Other Common Symbols
Beyond just numbers, you'll encounter other symbols on guitar tabs that tell you to do different things. Here are a few common ones you'll learn as you go.
Slides ( / or \ ):

A forward slash '/' (down slide) or a backslash ' \' (up slide) between two fret numbers means you play the first note and then slide your finger to the second fret without lifting it. Sometimes you might see a slide symbol with no starting number, meaning you just slide to that fret from anywhere
Hammer-ons (h):
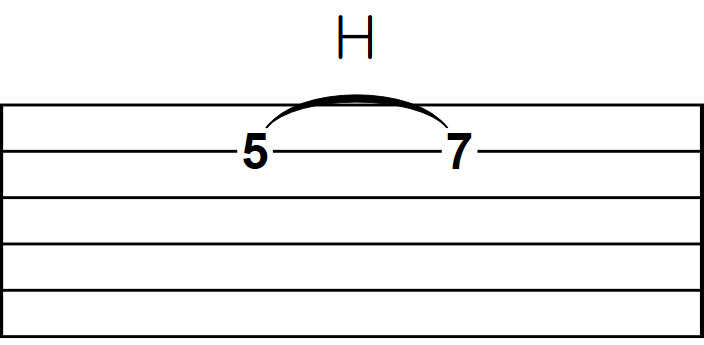
Play the first note, and then without picking again, you quickly tap or "hammer" down another finger onto a higher fret on the same string to produce a note.
Pull-offs (p):
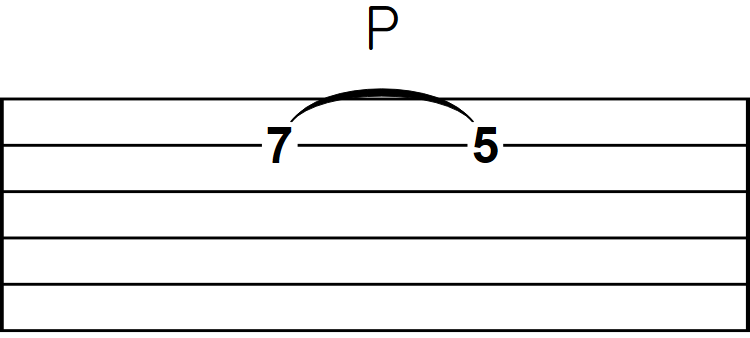
Hold down a fret and pick the string. Then, without picking again, you quickly flick your fretting finger off the string, causing a lower open string or a lower fretted note (if another finger is pressing) to sound.
Bends (b):
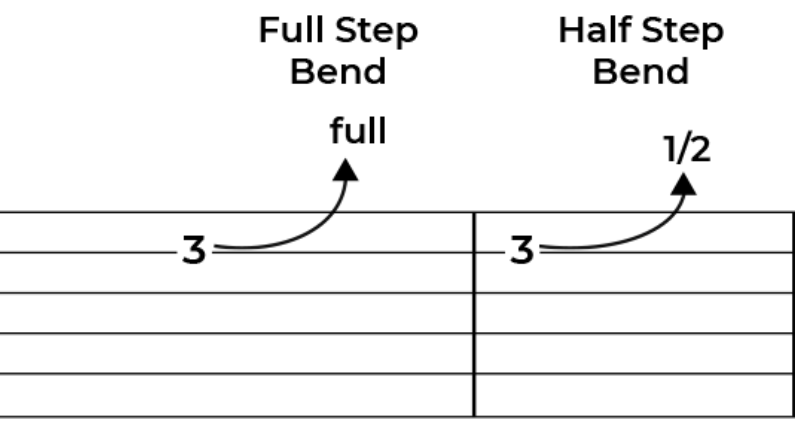
Play a note and then bend the string upwards (or sometimes downwards) with your fretting finger to raise the pitch. A curved up arrow is used to indicate that the note needs to bend. You might see 'b' followed by a number indicating which fret the bent note should sound like (e.g., 4b5 means bend the 4th fret to sound like the 5th fret). 'br' means bend and then release. 'pb' means pre-bend the string before picking it.
Strumming
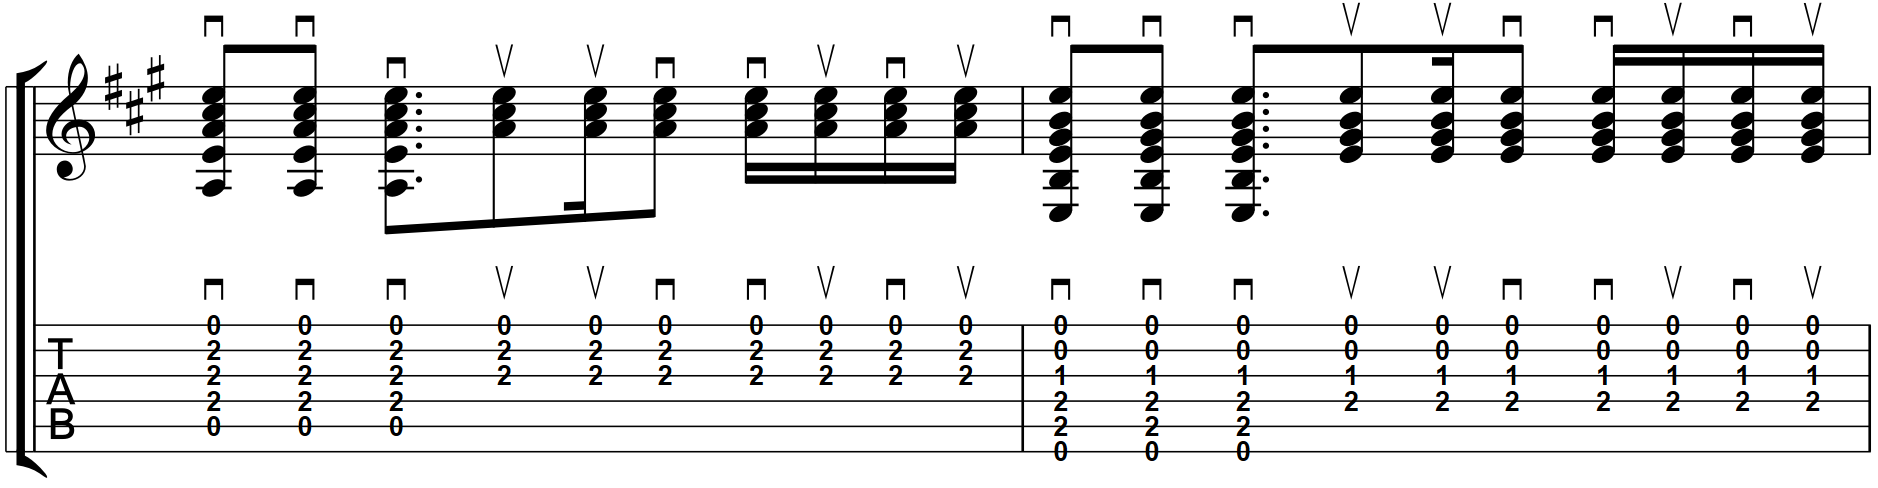
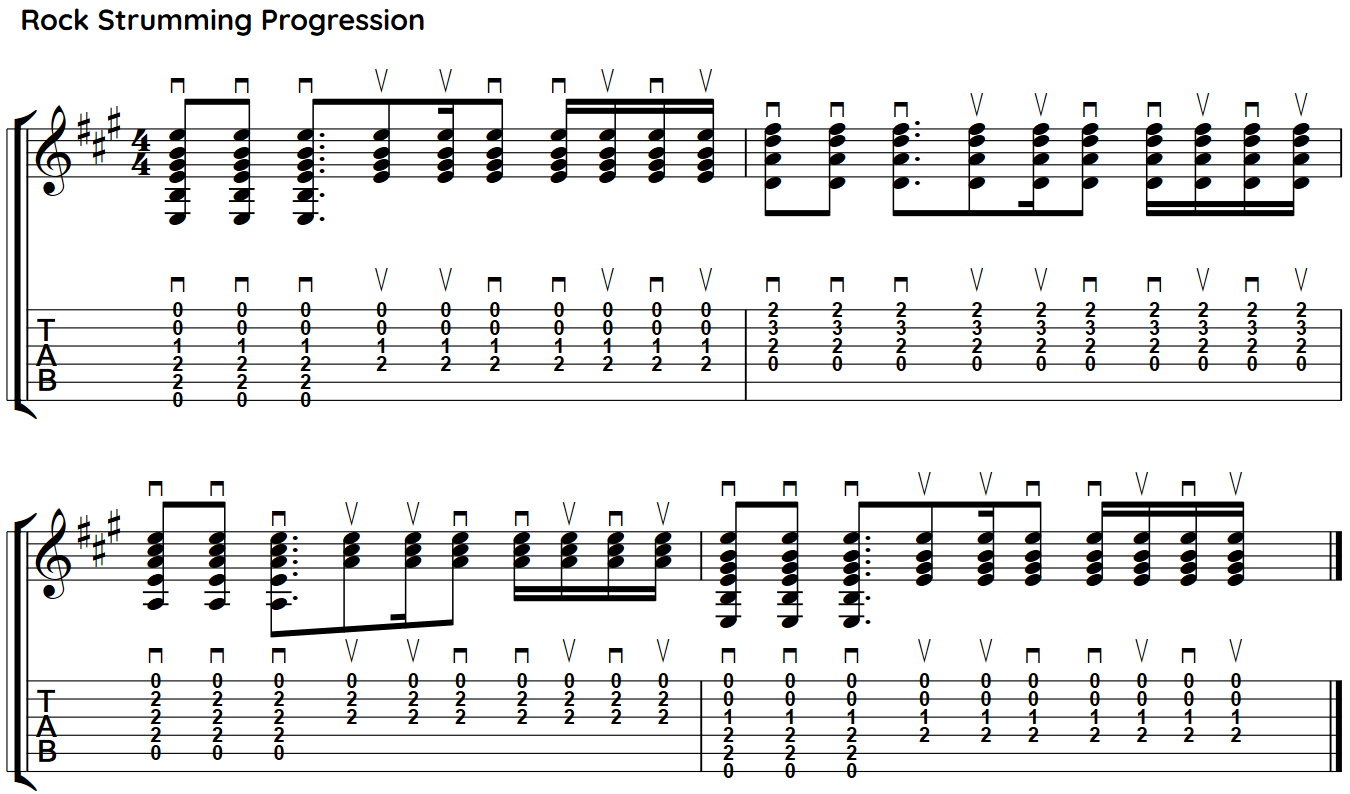
There are no universal strumming symbols for tab. A variety of symbols are used to indicate up and downstrokes strums. The symbols above may be used along with arrows and can be shown above or below the tab. Arrows can be confusing within the tabs as they point in the opposite direction of the strum.
Vibrato (~):
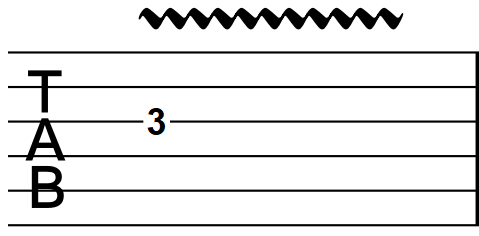
You rapidly bend and release a note to create a wavering or vibrating sound.
Dead Notes (x):
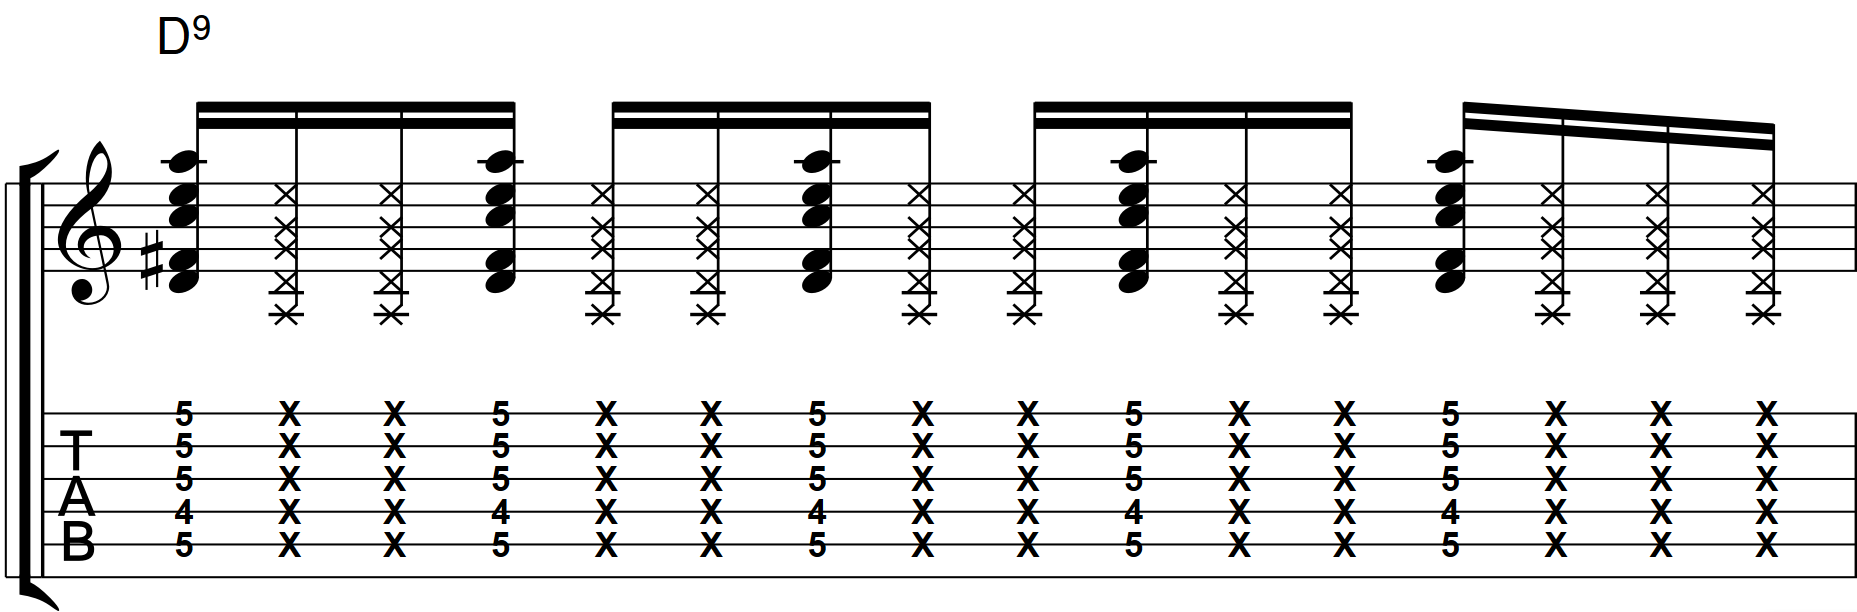
An 'x' on a string's line means you should mute that string so it doesn't ring out when you strum.
These symbols are like extra instructions on your map, telling you to take a special turn or use a particular technique. Trying to learn all the symbols at once can be overwhelming. Focus on the basic numbers and learn new symbols as you encounter them in songs. There are many resources that explain these symbols when you need them.
Rhythm and Timing - the Missing Piece
Standard guitar tabs you find online usually don't tell you the rhythm of the song. They show you which notes to play and when (in sequence or together), but not for how long each note should be held or the timing between notes. You need to listen to the actual song to learn the rhythm. Always listen carefully to the original recording of the song you're learning from tab. Try to tap along to the beat and feel how the notes fit into the rhythm. Some more professional tabs might include rhythmic notation above the tab staff (like traditional music notes), which can be helpful if you understand it.
🎸 Try It Yourself! Play this pattern and listen to the sound of the notes.
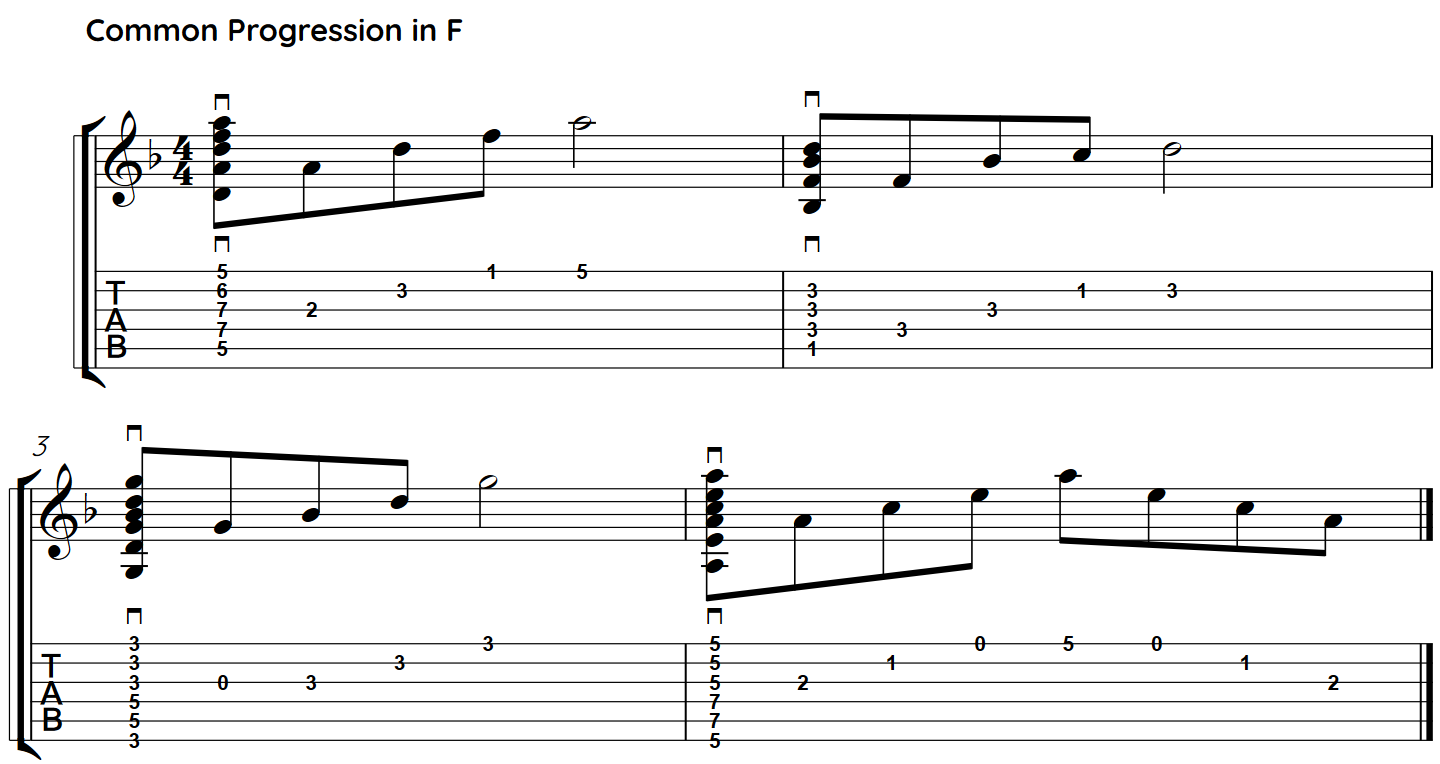
Want to understand how these notes fit into scales? The Noisy Clan Circle of Fifths makes transposing and songwriting effortless!
Why We Don’t Show Fingering
Tabs don’t show fingering ever. They just show what notes to play and in what order.
Fingering is situational. The best fingers to use depends on the next chord or note in the song. Hand size and playing style affect the best approach to forming a chord. Different players will use different hand shapes for the same notes depending on their comfort, familiarity and physiology.
Instead of forcing you into one way to play, we encourage you to find what’s comfortable and natural for your hands.
Our fretboard diagrams differ from tab. We show you directly in the diagram how to form a chord by the placement of the dots. We show the structure of the chord. The numbers that we call out on the fretboard are not the frets or the fingers. Our numbering shows the chord structure.
Learn at your own pace! Noisy Clan’s interactive music tools help you practice smarter, not harder. Explore all our learning resources here.
How TAB Works with Noisy Clan’s Learning Tools
We see TAB as a stepping stone to a broader understanding of guitar. When paired with visual tools that show you chord structure and fretboard layout, you can progress faster and more intuitively.
Our fretboard diagrams use the same orientation as TAB, helping you move from simple songs to full-scale playing.
The Guitar Chord Compass lets you visualize how notes connect across the neck.
The Circle of Fifths Decoder helps you make sense of musical relationships, scales, and songwriting.
When these tools work together, you’re not just learning songs—you’re learning how music works.
Final Thoughts: TAB Is Just the Beginning
TAB is one of the most accessible and powerful tools for learning guitar. With it, you can start playing your favorite songs today, even with minimal theory knowledge. As you grow more comfortable, pairing TAB with visual tools and listening practice will round out your musicianship.
If you’re just starting out, try playing a simple chord progression like G – C – D. Find the TAB online, and listen closely to the original recording. With practice, you’ll be able to play it naturally and with confidence.
Want to go further? Check out Noisy Clan’s Chord Compass and other interactive tools that support your learning at every stage—from your first chord to writing your own music.
Let TAB be your map, but let curiosity be your guide!